Showing posts with label before and after. Show all posts

Wednesday, August 17, 2011

Toodling Around

Being Silly


Hello World! It's me...Caleb!

Taking morning walks, enjoying our front porch

Sneaking in some sewing time while the little one sleeps


What have you been doing this week?
Have you had a good cry because your baby started school?
Did you get to enjoy some alone time?
Are you reading a book you can't bare to set down?
Have you had a snow cone?

We have...maybe more than one :)

Today I am in old shorts and a tank top with no make up.  I kinda like it that way today.  Nothing to do, no where to be.  Just me and my buddy spending time with each other.

Not every day is like this so I will soak it all in.

Tuesday, May 17, 2011

Before and After Spray Paint Makeovers!

Patio Furniture Before:


And after a few coats of some Krylon Spray Paint!

And some stripe detailing with a foam brush and "French Vanilla" Acrylic paint, which really looks yellowish, but I like it!

$5 Gina's Junk Table Before (Pretty but Rusty!):


And AFTER:

I used some silver metallic spray paint!


Have you done any thrift store makeovers lately?

Tuesday, April 5, 2011

DIY Moroccan Herb Pots

I am such a cheap-o.  I LOVE all of the pretty pots that are everywhere, but I refuse to pay $20 for a POT!  So, I decided to make my own.

Supplies:
One can of spray paint (color of your choice!)
Terra-Cotta pots (I purchase my medium sized ones at Walmart for $1.98 a piece)
Plant
Chalkboard Paint (not pictured)


Lay out your pots, leaving a good amount of space in between.  It's a good idea to spray paint outside because it can be messy and smelly!


Give it as many coats of paint as you would like...allowing the pots to dry in between coats.  I did 2 coats...I liked the worn look of not covering the pots completely.  The terra cotta soaks up paint and creates a neat, rustic finish.


Make your own stencil.  Fold in half to make sure that you have an even stencil.  I did a Moroccan stencil, but you can do any shape...circle, square, polka dots....

Hold your stencil (or if you're not lazy like I am, tape it on!)

Using a permanent marker, trace around your stencil:


Then you paint inside of your stencil with your chalkboard paint.  It took 2 coats for me to cover the pot good.

Let them dry reallllllly good!


Plant your plants (I used herbs) and then label with your chalk.

Last year, I planted a big pot of 3 different herbs.  I used them to make a bean salad when my mom came to visit.  Later, I realized that one of my "herbs" was really a weed that had started to grow in my pot!  If I would've used a pot like this, I wouldn't have added a weed to my bean salad!  Although it makes for a pretty good story because we ate the salad before we figured out what I had done :)


Linking up with:

Wednesday, March 16, 2011

Boring Chalkboard to Va Va Voom Chalkboard DIY Makeover!


I started with the largest plain chalkboard size they had at Hobby Lobby and it was $12.99- a good deal if you ask me!

Then I painted the frame white:
I also purchased 12 wooden circles at Hobby Lobby (2 for $1.00).  I laid them on a trash bag outside and did my favorite thing with them....

SPRAYPAINTED!!!! It took me several coats because I bought the super cheap kind and I definitely should have paid $2 more and gotten the good, Krylon spraypaint...lesson learned

Voila', 12 spraypainted circles....and you're done!

Just kidding.

Next I glued the circles onto the top and bottom of the frame and added my flav-o-favorite...a peacock feather!

Testing, testing, 1-2-3


Yay! Time to make a to-do list...or plan out my menu for the week...or just write "Winning!" really big across the thing.


Linking up with:


lil luna link party button


this blessed nest


Friday, December 3, 2010

Thrift Store Makeovers Take 2

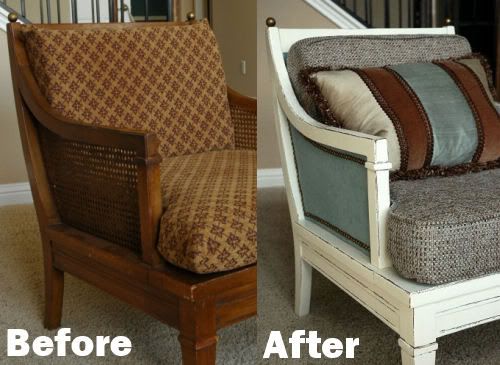
I have already done a blog post on furniture makeovers in the April 2010 archive but I just love them so much and there are too many out there to not do a series of posts!  I hope you enjoy them as much as I do :-)

Plain wooden table from Design Dazzle...
Turned to a fabulous, funky chic table!


Another chair saved by Living with Lindsey:


Dated retro table

turned bright and colorful by Design Sponge:


Classic, yet blah cabinet:

Very chic, updated after by Sonnet Interiors:


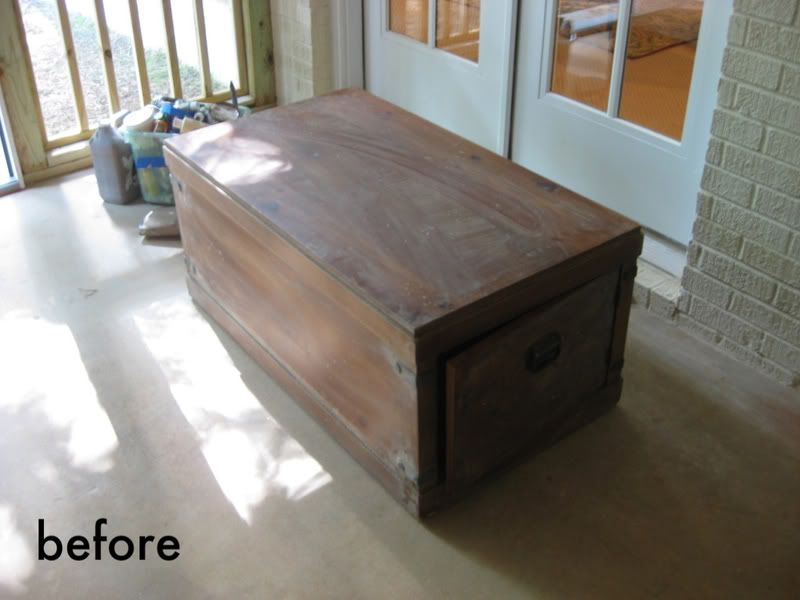
Run of the mill chest:

Beautiful, hand aged chest by k.f.d designs (a new favorite blog!):


And the most unbelievable before:

To a FABULOUS after by style maniac: