Saturday, February 12, 2011

The Best Notebook Paper

Ta Da!  When I have a few seconds to actually think, my brain will come up with a cool idea every now and then (or at least what I deem to be somewhat cool).  Here's what my brain thought up the beginning of the week:


Description:
How fun is this? Notebook paper can be boring, but not when it holds coffee!

You have two choices for this listing:
1. You can pick a note, quote, saying, etc. to permanently have me write on the notebook paper mug in either cursive or print handwriting (I have both examples shown).

OR

2. You can have the notebook paper design permanently baked onto mug and sent to you with a dry erase marker so you can write, erase and re-write on your notebook paper mug.

Choose which option and leave your choice in the message section at checkout :)


HAPPY WEEKEND!!!

Friday, February 11, 2011

No Sew Heartbreaker Valentines Shirt Tutorial


This is such an easy tutorial and it will look so cute on your kiddos!  OR you could make matching ones for you and your family if you are interested in being cute and cheesy...and I always love a cute+cheesy combo :)


SUPPLIES:
Plain T-shirt (I got mine at Walmart for $2)
Red (or pink) and black felt
Fabric Glue

STEP 1:
Make a heart shaped paper stencil
Grab your red or pink felt and lay the stencil on it, cut around the heart


STEP 2:
Cut the heart into two pieces using a zig zag motion


STEP 3:
Cut out an arrow from the black felt.  You can make a paper stencil for this, or just eyeball it like I did...I think it's cute when it comes out a little uneven.

Cut arrow in half

STEP 4:
Lay your felt out on the shirt and glue on using the fabric glue...make sure to lay it on thick around the edges!  I didn't use enough the first time around and had to go back and glue some more.
Make sure to let it dry overnight....or all day before wearing.


STEP 5:
Show off your cute kid!!!


Wednesday, February 9, 2011

Vlog Debut- Regional Dialect

I saw this first over at Pickles on Pizza which she saw over at The Ruffly Owl.  When Seth and I did the video, I hadn't watched the original (at The Ruffly Owl) so I really wasn't sure what it was meant for, but I figured it had something to do with the accents that we have...then I watched the original one and realized I was right...it's about your regional dialect, which can be pretty funny!  OR will be even funnier if you try to get your husband to make a video with you doing this, without telling him the point of it..and for my plan ahead, "A" personality husband, this was torture :) 
 This is my debut vlog and I will admit that right before we did the video I had the giggles, majorly....and still had them while we were doing it!  It was a lot of fun though, and I learned a little bit more about Seth.   I will post the words and questions you are supposed to say and you can try it out yourself...and if you're feeling giddy, video and post it for us to see!


Say these words:

Aunt, Route, Wash, Oil, Theater, Iron, Salmon, Caramel, Fire, Water, Sure, Data, Ruin, Crayon, Toilet, New Orleans, Pecan, Both, Again, Probably, Spitting image, Alabama, Lawyer, Coupon, Mayonnaise, Syrup, Pajamas, Caught

Now answer these questions:

What is it called when you throw toilet paper on a house?

What is the bug that when you touch it, it curls into a ball?

What is the bubbly carbonated drink called?

What do you call gym shoes?

What do you say to address a group of people?

What do you call the kind of spider that has an oval-shaped body and extremely long legs?

What do you call your grandparents?

What do you call the wheeled contraption in which you carry groceries at the supermarket?

What do you call it when rain falls while the sun is shining?

What is the thing you change the TV channel with?


P.S.  I have NO idea why the video is cutting off 1/2 my face...sorry!

Tuesday, February 8, 2011

Pillow Case Maternity or Not Shirt Tutorial

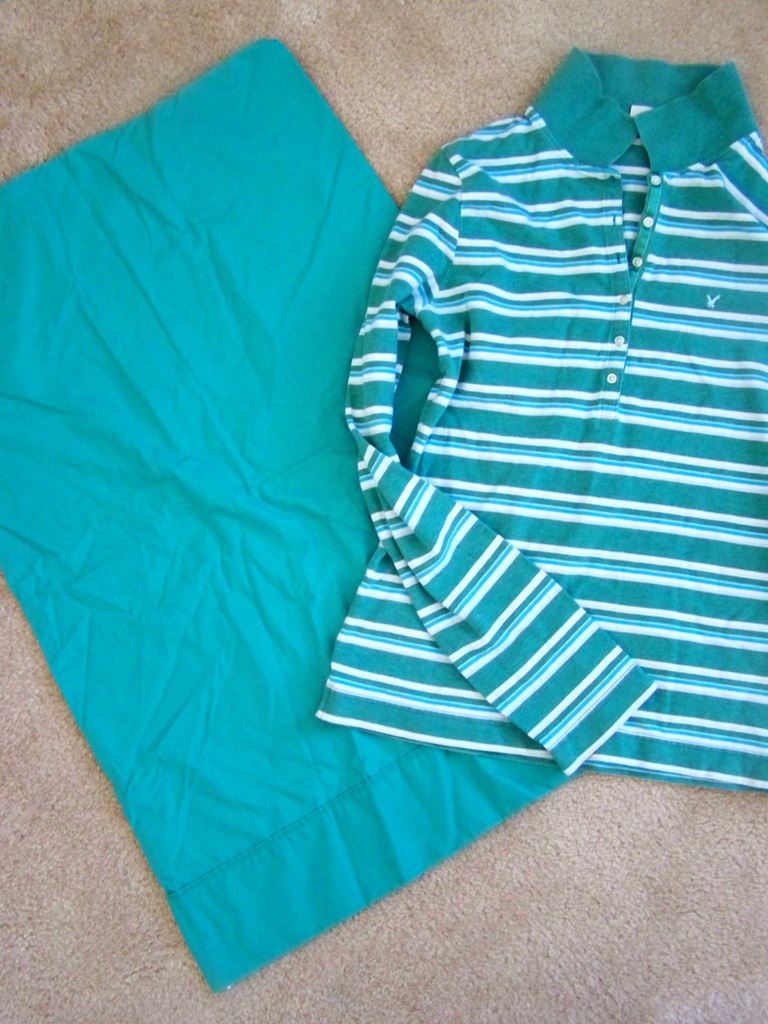
I love making things from pillow cases.  You can find so many neat colors and prints for really great prices.  This is a tutorial of a ruched pillow case top and is even great for a maternity top too!

Start out with a pillowcase of your choice and some matching, stretchy fabric.  I am choosing to use the sleeves from a stretchy shirt that I no longer wear.


Measure the length of your pillow case and cut two strips about 3" shorter than the length of your pillowcase. These are about 5" wide.


Now, cut the top off of your pillowcase.  Cut as little off as possible.


This will leave you with a pillowcase with open ends


Next, cut open each side of your pillowcase.


This will leave you with your two strips and the pillowcase, which has been cut completely apart.


Here is where is may start getting a little confusing.  You are going to take your long strip and starting at the bottom finished edge of one of the pillowcase pieces, you will sew right sides together while slight stretching the strip.  Remember that your strip is 3" shorter than your pillowcase and you want to end up stretching the strip so that it still ends up lining up with the top and bottom of your pillowcase piece.  Stretching the strip while sewing will create a nice ruched look on the sides of your top...you will see in just a minute :)


You have now sewn one strip to one side of the pillowcase.


Grab your other pillowcase piece and do the same thing to it...sewing it to the strip, right sides together while slightly stretching the strip.


Your "top" should look like this.  I like to think it looks like a rectangle butterfly.  The strip in the middle and the two pillowcase pieces sewn on.


Grab your other strip and right sides together, stretch and sew it onto the pillowcase...are you getting the idea?


Here is a picture of me stretching the strip while sewing it onto the pillowcase (note: I am only stretching the strip, not the actual pillow case piece):


If you are still on track with me, your top should look like this:

It's time to finish the top edge of your top...I serged mine but you can just as easily do a zig zag stitch or a hem.

Here is the step where the tube top should start looking like an actual top.  With right sides together, sew the strip onto the only remaining pillow case side that's left, stretching and sewing....last time!


Your top should look like this:


Grab some elastic, any size you would like.  You are going to stretch and sew, with a zig zag stitch, the elastic around the top part of your pillowcase top...making sure that it is tight enough to hold your shirt onto you!

Sew the elastic all the way around until it meets.

Here is what the inside top of your pillowcase top will look like:

Here is what the top will look like when laid flat.  This is where you have the choice to keep going or not.  If you like your top the way it is, then you're done!  I however wanted a little more ruching on the sides, so.........


I cut a couple pieces of elastic and sewed them, while stretching, onto the inside of the strips, on both sides of my top.

It will look something like this on the inside:

Here comes the fun part!  Trying it on!

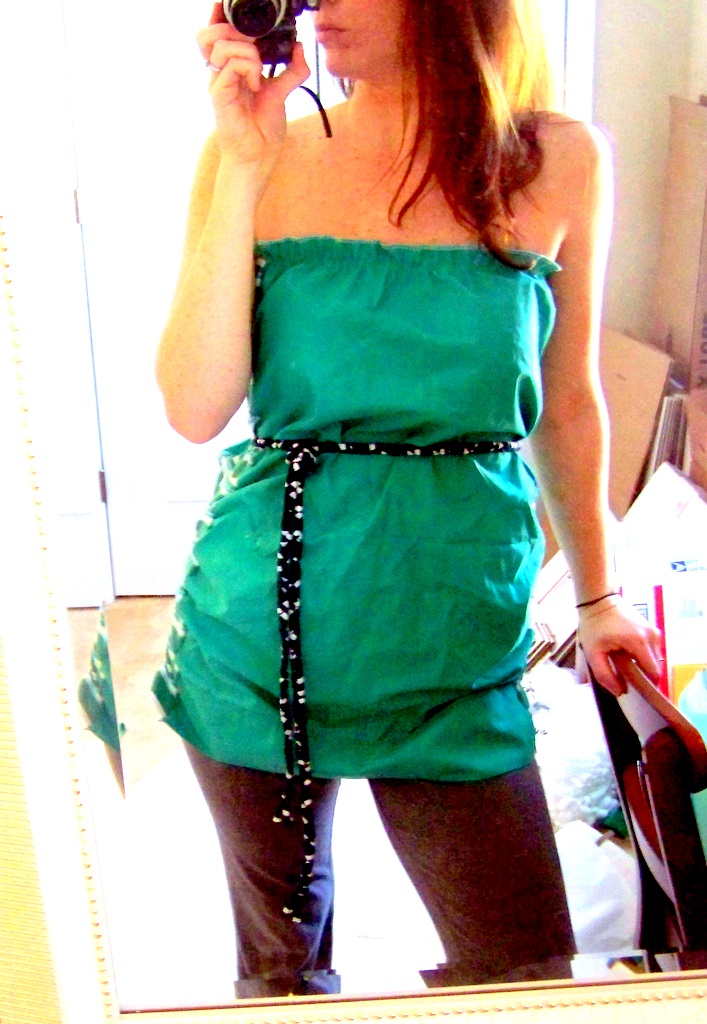
I added a sash (that doesn't happen to match, but it was handy at the time!)


The ruching creates a fun, flattering side seam.

You may have to alter it a bit.  Take in the sides or add more elastic so it fits better.  It's pretty versatile so you can do a lot of things to it and with it to create a nice fit.


The new thing for maternity wear is ruched sides...making this top perfect for pregnancy too.
Wear it without a sash....


Or with a sash!
AND its great for post pregnancy for hiding the belly and for nursing a baby.


If any of you try this out, will you PLEASE email me a pic???? I would love to see what you come up with!

Monday, February 7, 2011

We Love Cereal

Caleb's first cereal experience:

Two, yummy cheerio filled bowls...one for daddy and one for Caleb


Spoon in hand, ready to dig in


Uh Oh! Dropped a little bit


Daddy's gonna try to help


A successful bite!


This is fun, let's keep going


Spoon pick up #2


But....still needs a little help


And then the unthinkable...

Crying over spilled milk...


More help from daddy


"Well...mine's all spilled but daddy's still looks good!"

"I'm not so sure about this whole cereal bowl thing..."


I just be chillin in my diaper instead

P.S. Seth is NOT pantless in this post!!!  He has his army shorts on which are shorter than most shorts, so when he sits down, they ride up...just wanted to clarify any confusion!!! :-D LOL