Showing posts with label baby. Show all posts

Thursday, April 5, 2012

Baby #2 Nursery Reveal!


I made the curtains and throw pillows from the same grey and white material.


The bunting garland was made by cutting out triangles of different fabric and sewing them together.


Someone wanted in on the pictures...


I found a large framed piece of art at TJMaxx for $10 on clearance.  I took the frame off, spray painted it yellow and then used chalkboard spray paint to paint the glass, then I used chalk to create my "art" which I can switch out when baby gets older.


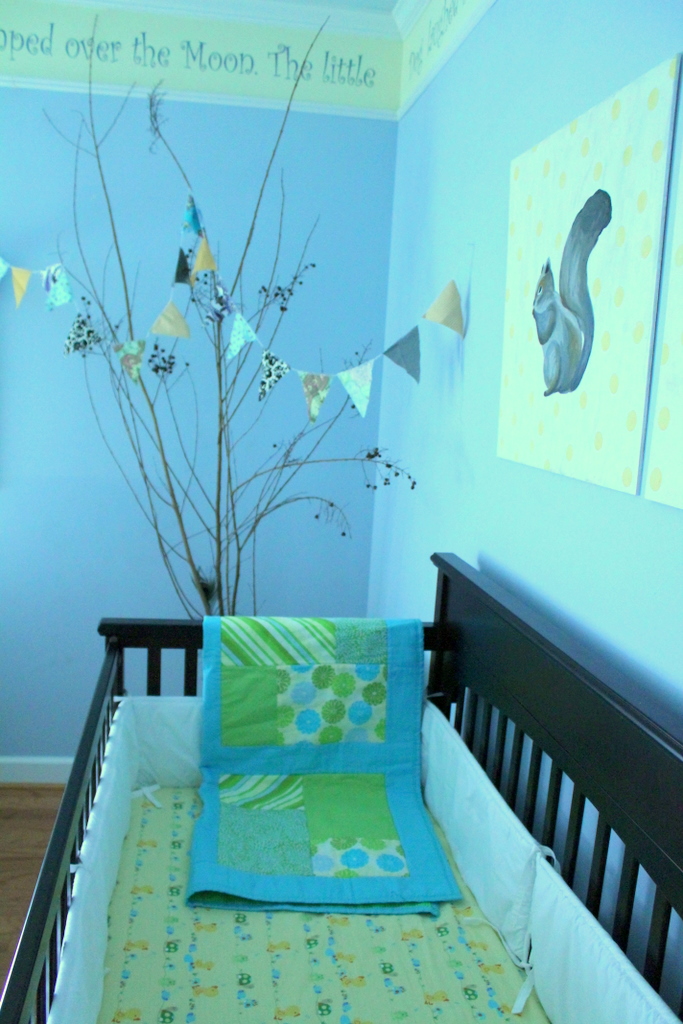
I created the "tree" by grabbing some lightweight branches from outside and putting them in a big pot.


I painted these onto 2'x2' wood boards. 
 I didn't originally plan to do woodland animals but it just kind of happened and I really like how it all came together. 
When you're doing a gender neutral nursery that is already painted blue, it's hard to figure out a good happy medium and animals are perfect for a boy or a girl.

This is the beautiful crib quilt that my sister in law, Sarah, made.
 I love it so much and can't wait to take pictures of little baby on it!


I love these smocked outfits! 
 I found both of them for under $10 and I am so excited to find out which one I will be using.


Caleb painted this picture all by himself for the baby.  I have to give the credit for this idea to Seth.  I was stumped on what to put above the bed.  Ideally, I'd love a headboard but that just wasn't happening right now, so Seth came up with this idea!  We found this great sized canvas at Hobby Lobby for $15 after using the 40% off coupon and Caleb had a lot of fun creating this for his baby.

I asked him if he would go stand beside his painting so I could take a picture and this is what he did...he is such a nut!


I also made the crib skirt from the same material as the curtain and pillows.


Now that the nursery is done, all that's left is to wait for the baby to get here and we are so ready...especially this little guy!

Tuesday, April 3, 2012

Shhhhhh....


I have been wanting to make one of these for months now. 
 Then, I spotted a cute one on Pinterest and decided it was now or never. 
 I was taking a walk and found some scrap wood my neighbor had thrown out...so I grabbed a piece, knowing it was the perfect shape and size for my sign.


Some of you, especially if you've never experienced the joy of finally getting your baby to sleep, only to have someone ring your doorbell, may think this is rude or extreme.
  But I can almost promise you that if and when you have a newborn and you're so sleep deprived you can't even find the energy or brain function to brush your teeth, when you look at this sign you will literally see glowing halo's all around it.

Okay, maybe not halo's but it will make your heart skip a beat!


I spray painted it aqua (surprise, surprise!) and then I used a circle foam brush to make polka dots.
After that dried, I used a Sharpie oil based paint pen to write my wordage, and just an FYI for all you paint pen folks, I will NEVER use another brand of paint pen again.  
The Sharpie oil based pens are amazing and they go on so smooth and even!
  No shaking or messing up because a big blob came shooting out.  
I can't say enough great things about them.


After that, I hammered in a metal hook to the back and used ribbon to attach it to my door.
Cute and functional...and I dare someone to ring my doorbell when my sign is hanging up! ;-)

Baby update:
Went to doctor this morning for 38 week check up and she said she definitely is seeing some progress!
I went from absolutely ZERO signs of labor last Tuesday to 2cm dilated today, so I'm happy :)
At least baby plans to come out at some point.
Here's my 37 and 38 week belly pics:


We are getting super excited about little baby!
Now, we just need to decide on a girl name since we are fairly sure about the boy name ( I say that reluctantly because it seems as soon as we think we are certain about a name, one of us comes back with another idea...ha!).
I'm off to finish the nursery...hoping to post pics by Friday...I have worked on this nursery for several weeks and I can NOT wait to show you the fruits of my labor...which hopefully will be followed by actual labor ;-)

Monday, March 26, 2012

For the Girl...For the Boy

I will just have to tell yall that the suspense of not knowing whether Baby Wade #2 is a boy or a girl has finally gotten to me! I just can.not.wait to find out!!!
I am a little over 37 weeks and I go for my checkup in the morning.  Last week, my blood pressure was high but it came down before I left the office so I didn't have to go to the hospital and be monitored.  I hope it isn't high this week.  I've been trying to relax and not let anything upset or worry me...which is easier said than done!  I'm thinking I should go get a prenatal massage...what do yall think??? :)

Being that I can't stop thinking about whether we are having a baby boy or a baby girl, I decided to post some of my favorite baby things for both genders.


For the GIRL


Source: etsy.com via Paula on Pinterest


Source: etsy.com via Paula on Pinterest


Source: etsy.com via melissa on Pinterest


Source: etsy.com via Melissa on Pinterest


For the BOY


Source: etsy.com via Paula on Pinterest


Source: etsy.com via Paula on Pinterest


Source: etsy.com via Paula on Pinterest


Monday, January 16, 2012

DIY: Stamp & Paint Baby Sleeper


This is a simple tutorial on how to snazzy up a plain sleeper (or onesie, or t-shirt or pair of pants, or, or, or...)

Step 1: Start with a plain sleeper.
  I found this cute one, brand new at a thrift store.  I loved the simple grey and white stripe design (can't wait to put it on my bebe!)


 Step 2:  Gather supplies as though you're a pilgrim gathering food on Thanksgiving day.
  Okay, you don't have to work that hard.  
In fact, you only need three items: your choice of fabric paint, a foam brush and some letter stamps OR stencils.  I found these large stamp letters at Joanne's on sale one day and had to grab them up and I have used them on tons of projects. 


Step 3:  Liberally apply paint to your stamp, and stamp away!  
Being careful to make sure you line things up nicely.  Don't forget to put a piece of cardboard or card stock in the sleeper so the paint doesn't leak through.


Tah Dah! 
 Make sure to follow the instructions on the back of the bottle of fabric paint.  I have found after you let the paint dry really good, laying a towel over top of your design and ironing over the towel heat sets the fabric paint, allowing for more durability.
  Definitely allow for as much time as possible for the paint to dry before you wash it!


How simple and cute is this?
Inexpensive too!
I'd love to see your painted clothing if you get crafty and decide to paint something :)

Happy Monday everyone...
I hope this is the start of a GREAT week for you!!!